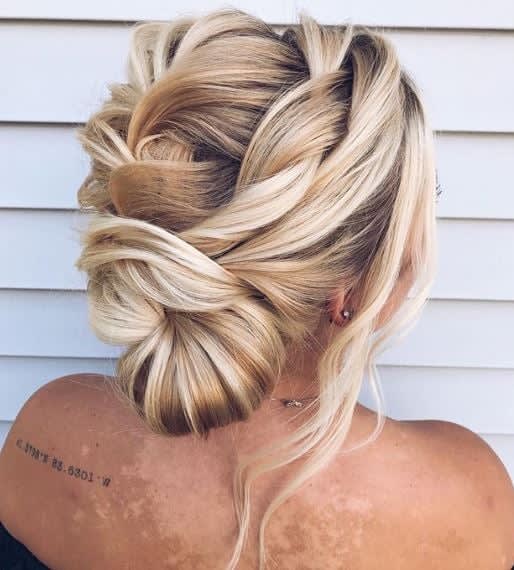
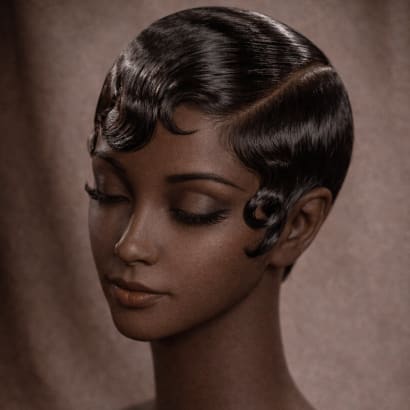
Artist Connective member Caralee Pridemore is known for her classic and timeless updos. Here, Pridemore shares with MODERN how to recreate a stunning low textured bun in an easy-to-follow video tutorial:
1. Start by a texture iron the hair close to scalp to about 1” down the hair shaft.
2. Backcomb in a brick lay pattern from crown to occipital point or down to the nape, this is all preference. The further down you backcomb, the more secure your pins will go in.
3. Use a texture spray for extra grip on the hair.
4. Brush out backcombed sections to create a smooth canvas, spray with a texture spray then a shine spray to get rid of dullness.
5. Leave hair out in the front (face framing sections)
6. Starting at the crown, pin first section in place. Continue cris-crossing sections over each other going in the direction of you bun placement. For this look, I gathered all sections towards the side, and pulled them apart.
7. Once all of your sections are cris-crossed down to the lower part of the ear, pin all in place.
8. Use a Bungee Hair tie to create a ponytail (this will leave the top sections undisturbed.
9. Take the remaining ponytail and create a rope braid (split hair into two sections and twist)
10. Gather the rope braid and twist it up and to the left. Pin in place, and form a bun with the remaining hair.
11. Take the two front sections left out (see step 5) and repeat the rope braid, going into the finished bun. You can leave tight for a more sophisticated look, or pull apart for a softer romantic style.
12. Pro Tip – Always leave some pieces around the face to soften the clients face shape, curl those pieces away from the face. Always make sure the ears are covered.