


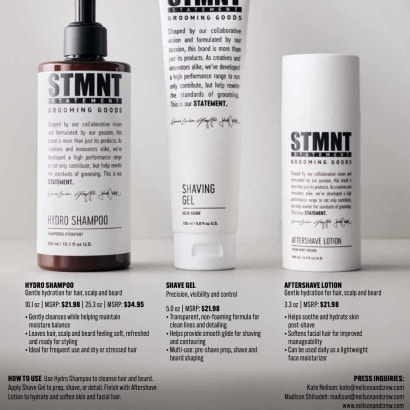
STMNT Grooming Expands into Shave Care
STMNT Grooming Goods is expanding into the shave care category with three new additions to its lineup.
Learn the steps to create a perfect Crochet Braid
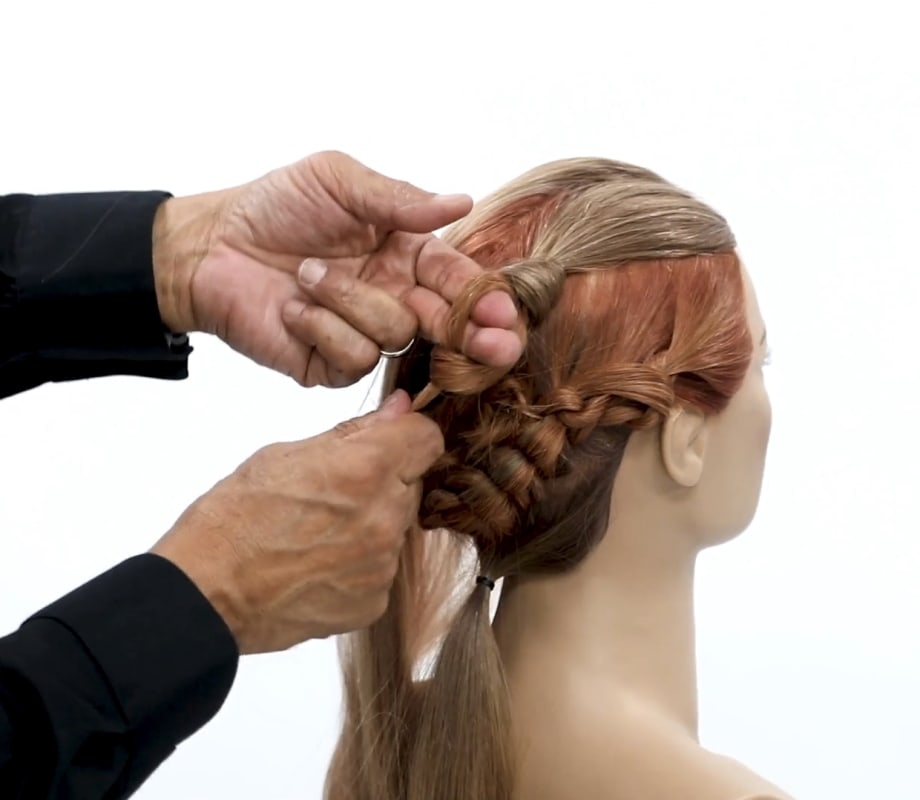
Crochet Braid by Sam Villa
The Crochet Braid is one of the most impressive and intricate braids you can offer your client. Crocheting is a process of interlocking loops with a needle to create a pattern, and if you have the skills, can be easily transferred from yarn to strands. Sam Villa, Co-Founder of Sam Villa and Global Artistic Ambassador, is a styling expert and applies the method to hair using fingers as the needle to create a crochet braid.
“I’m loving this crochet braid technique right now because you can build remarkable visual texture that can be modified in many ways, so it can meet the needs of multiple salon guests,” Villa says.
STEP 1: Isolate a rectangle section on the top of the head and clip away with Sam Villa Cutting Clips.
STEP 2: Take out an accent piece at nape area and clip aside.
STEP 3: Apply Redken Rough Paste 12 on the top side of one hand for easy access.
STEP 4: On the first side, take a diagonal forward section and apply a small amount of Redken Rough Paste 12 to bind section together.
STEP 5: Using the index finger and thumb as the crochet needle hook, hold fingers on the outside of a slice of one of the sections, loop the tail to create a circle and pull the hair through enough to make a new loop. Take another slice from the side; add to the tail, feed through the loop and pull. Repeat. When there is no more hair to feed into the slice, continue the technique without feeding hair until the end and secure. Repeat on other side.
STEP 6: Fold both sides together at back to create a chignon.
STEP 7: Divide top rectangle section in half and continue crocheting one side and then the other without feeding hair into the sections. Keeping consistent rhythm and apply product to bind the pattern. Pin each section over the existing chignon.
STEP 8: Take out accent section at nape and backcomb for a dramatic visual effect in the back.
“I like to come up with new ways of braiding to help keep me enthused and motived behind the chair. Remember, there’s danger in the comfort zone!” Villa adds.
VIDEO TUTORIAL:
STMNT Grooming Goods is expanding into the shave care category with three new additions to its lineup.
The launch of Moroccanoil's Sculpting Pomade highlights a renewed focus on styling within the brand’s iconic haircare lineup, advancing the category with elevated formulas, refreshed packaging, and a clearly defined trio of styling essentials.

Curl Cult founder Janine Jarman, a hairstylist, salon owner, educator, and product creator, is opening a community investment round that gives hairdressers and clients the opportunity to own a stake in the company they helped grow.
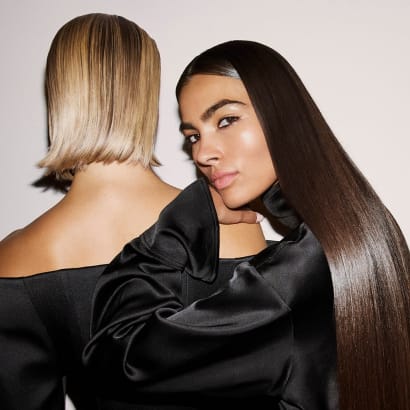
With Structured Texture: Runway Shapes, Real-World Textures, Monae Everett wanted to bridge the gap between high-fashion hair and the real textures stylists work with every day.
Bee Sam’s VanStrands blend shimmer, color, and customization into a trend-forward enhancement designed for modern salon clients.
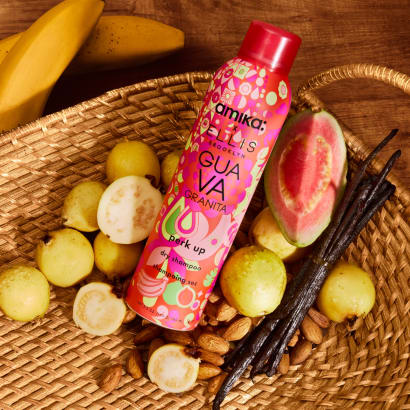
Perk Up Guava Granita Dry Shampoo is a juicy new launch from amika that puts a tropical twist on their bestselling dry shampoo with notes of guava, banana and vanilla inspired by sunshine, smoothies, and vacation energy in a bottle.

Shine Time: Aluram’s High Shine Line Delivers Moisture and Shine with Clean Ingredients
Sponsored by Aluram
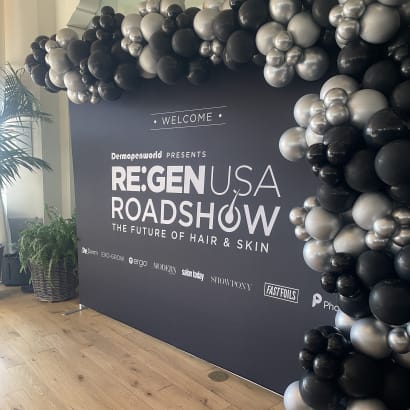
After a nationwide roadshow, DermapenWorld leaders share their biggest insights on the growing demand for hair loss solutions, and why education, empathy, and community are driving the conversation.
Oribe introduces an essential new addition to its iconic styling collection: Supershine Smoothing Wax Stick, designed for seamless styling.
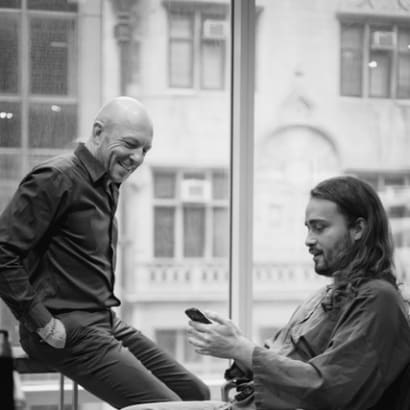
The Paul Labrecque Salon salon is finding success --for stylists and clients, alike--offering scalp care and specialized treatments. MODERN spoke to Moine about how this focus meets an important need and drives client loyalty.
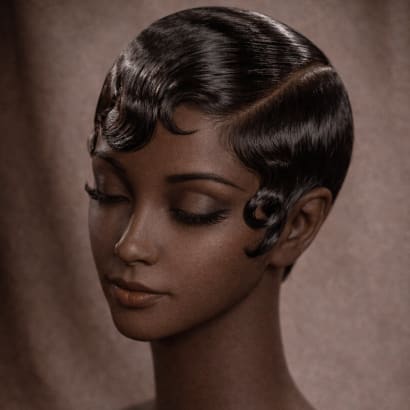
Before the pixie cut became a Hollywood symbol of modern femininity, it was already living, breathing, and evolving in Black culture. Texture expert and Moroccanoil Global Color Ambassador Greg Gilmore gives us an overview of the iconic Black women who popularized the pixie over the past century.
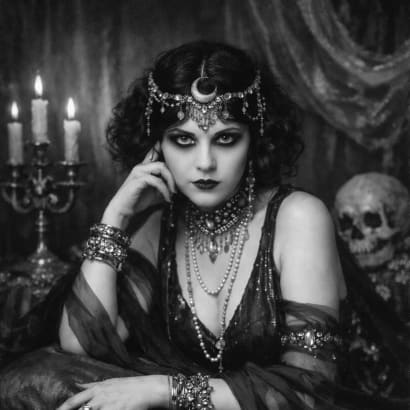
Romantic goth hairstyles are trending for 2026, and these Sebastian Professional artists have long anticipated the look.
Less frizz. No restrictions. Up to 3 months of smooth. Wella Professionals' SmoothFiller is the smoothing service your clients (and your revenue) have been waiting for.
Sponsored by Wella

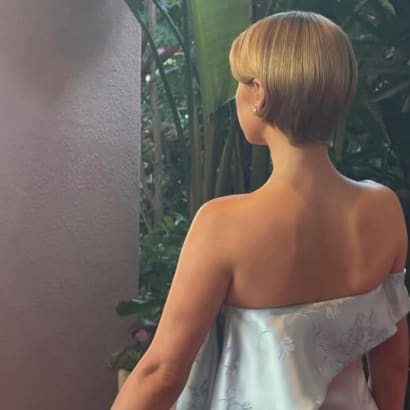
For her performance at the 2026 Grammys, Sabrina Carpenter wore a voluminous, retro flip bob created by celebrity hairstylist Evanie Frausto using Redken.
Oribe's Eternal Curls Collection provides deep nourishment and enhanced definition for every wave, curl and coil.
Celebrity stylist Bryce Scarlett channels Grace Kelly polish with Goldwell while colorist Jacob Schwartz takes Jessie from dark to luminous “Honey Silk Blonde” using Schwarzkopf Professional.
“We are some of the luckiest creatives on the planet. As hairdressers, we get to shape more than hair—we shape identity. We create for our clients, inspire fellow artists, and are continuously inspired by each other. That exchange of artistry is at the heart of this story and at the heart of this haircut."