





Why Salon Work Makes Your Body Ache & What You Can Do to Feel Better
We learn some simple moves and strategies to keep the blood pumping through the muscles and limit posture problems from The Balanced Beauty Pro
by Anne Moratto
 MENU
MENU SEARCH
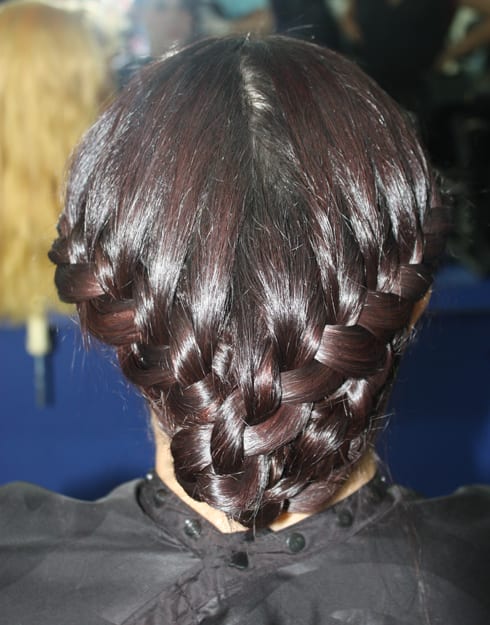
Stylist Osmeri Macebo from Corpus Christi, Texas, submitted various braid styles for MODERN's Stylist Contribution section. Here, Macebo provided us with steps to one of her favorite braiding looks--The Tuck Away Braid. Create it in three steps!
Step 1
Everyday on modernsalon.com, we receive a number of professional stylists’ photo submissions. Recently Osmeri Macebo from Corpus Christi, Texas submitted approximately 20 photos of braids she created on her clients. From French braids to fishtails, Macebo submitted it all. Recently, Macebo sent steps on how to re-create one of her favorite braid styles (which can be worn for both casual and formal occasions.) The braid below is easy to achieve, simply create two French braids then tuck under the hair for a more elegant effect.
Try it:
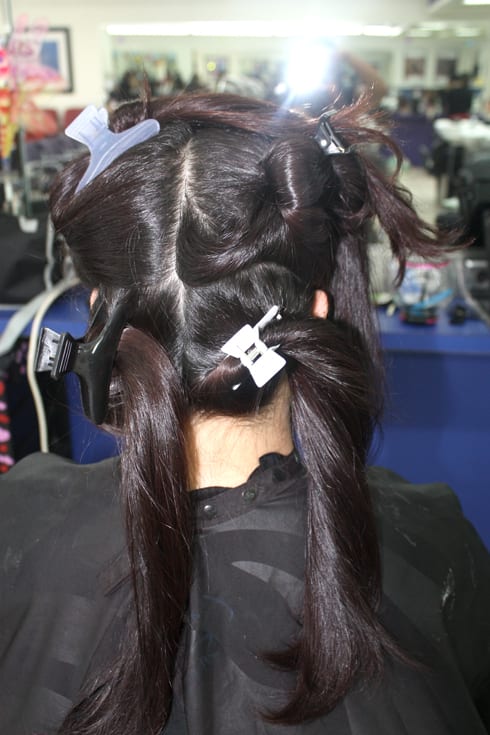
Step 1: Divide the hair into four sections (as seen in photo 1).
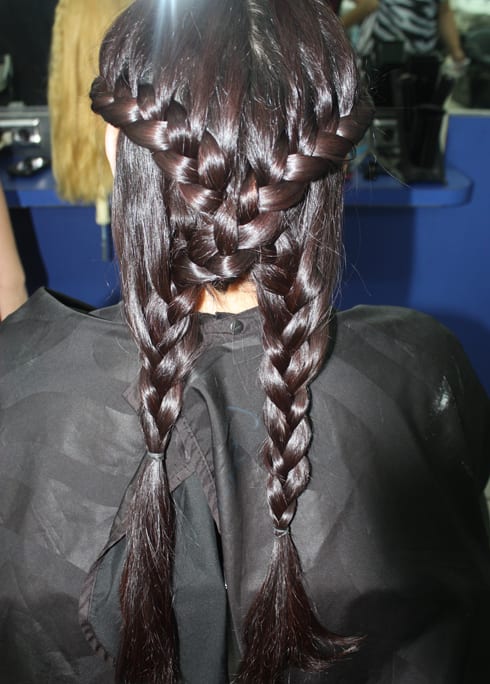
Step 2: Create two French braids beginning the first one in the left top section and then combining it into the fourth bottom section. Then, start the second braid in the right top section and combine it into the third bottom section. It should turn out looking like a criss cross braid.
Step 3: Flip the two ends of each braid under the opposite braid to create the final effect. Bobby pin the hair in place and hairspray to tame fly-a-ways.
If you would like to submit your work, click here.
If you would like to see other stylists' photo submissions, click here.
Step 2
Step 3
See a larger photo of this braid at the bottom of this story.
We learn some simple moves and strategies to keep the blood pumping through the muscles and limit posture problems from The Balanced Beauty Pro

Anny VanDriel, owner of Be Rosie Salon and creator of Pricing Isn’t Personal, volunteered to share a pricing presentation to beauty school students a year ago, and ended up learning more than she expected.

From the launch of the Ulta BeautyArtist Collective to the evolution of Trendspiration, celebrating stylists is what The Salon at Ulta Beauty does best.
Sponsored by Ulta Beauty

With more than four decades in the industry, hairdresser and MODE Education founder Stan Newton has built a career around the art and discipline of cutting hair, learning the rules so he can break them.
Beauty professionals should evaluate each service based on its popularity, profitability, and alignment with current trends. Conducting client surveys and analyzing booking data can provide insights into which services are in demand and which might be phased out.

LifeSpa leader Ali Yanez explains why strong mentorship, predictable income, meaningful recognition and the right work environment help beauty professionals build careers that last.

Whether a beauty professional chooses a commission salon, booth rental, salon suite or salon ownership, the common thread is having more choices than ever before.

Sport Clips Haircuts will host its inaugural "Level Up Live," a first-of-its-kind virtual event that combines live haircutting education, career inspiration, product knowledge, and employment opportunities for licensed stylists and cosmetology students nationwide.
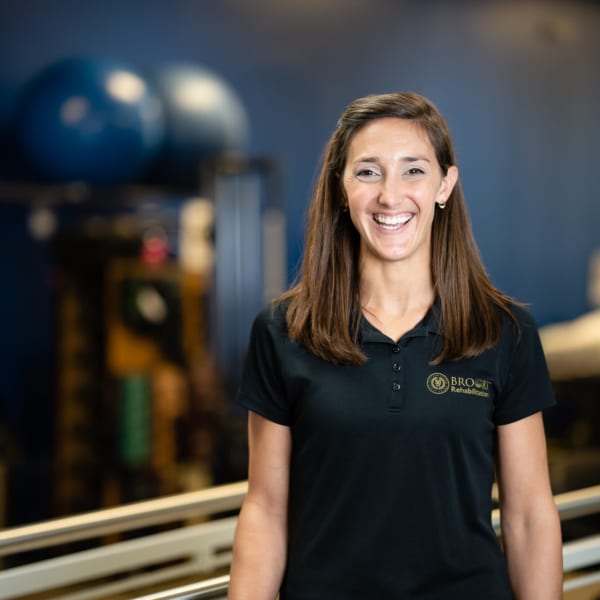
Orthopedic PT reveals three daily exercises plus ergonomic advice that can help salon professionals avoid the aches and injuries caused by standing, bending and repetitive overhead work.

Four publications for beauty industry professionals to enhance their leadership skills, financial awareness, professional growth, and joy!
Salon suite pioneer Karen Kaminski argues that the next evolution of independent beauty businesses won't be defined by beautiful spaces alone, it will be driven by smarter systems that help professionals spend less time on administrative work and more time serving clients.

At a time when many LGBTQ+ people felt compelled to hide parts of themselves, Carlos Valenzuela found a career in beauty and a community that offered opportunity based on what you could do and how well you could do it.

Whether it's social media, fashion, film, art, or culture, Chaz Dean advises stylists to stay aware of what's inspiring people. Take the elements that make sense for you in these five lessons learned through a life in beauty.

For Jessica Domoney, building a successful career isn't about saying yes to every opportunity, it's about protecting your time, investing in yourself and creating an experience clients won't forget.
MODERN SALON sat down with Samuels to discuss the book, beauty education, mentorship and the habits that help beauty professionals thrive.

"The mistake people make is treating AI like a vending machine instead of a personal assistant." Digital marketing expert Scott Moon shares how beauty professionals can use AI while staying authentic

Real-world advice on creativity, consultations, color, burnout, business, boundaries, inclusivity, client care, and career growth from educators and industry experts.